Our $1,000,000 AI film festival submission 🚨 I took 6 top Hollywood...

PJ Ace@PJaccetturo
112 views
Dec 22, 2025
~10 min read
Advertisement
1
Our $1,000,000 AI film festival submission 🚨
I took 6 top Hollywood cinematographers with ZERO AI experience and taught them a simple framework to master the tools.
You can easily learn this process in minutes 👇
Here are the exact tips, prompts, and framework we used: 🧵
I took 6 top Hollywood cinematographers with ZERO AI experience and taught them a simple framework to master the tools.
You can easily learn this process in minutes 👇
Here are the exact tips, prompts, and framework we used: 🧵
9:36
2
Backstory:
This film is based on the FIRST AI film that I made, a little over a year ago.
It got 500k views on reddit and I got addicted to the process of making films in my underwear 🤓
It's crazy to see how far AI filmmaking has come in a year 👇
This film is based on the FIRST AI film that I made, a little over a year ago.
It got 500k views on reddit and I got addicted to the process of making films in my underwear 🤓
It's crazy to see how far AI filmmaking has come in a year 👇
PJ Ace@PJaccetturo
And with 7min to spare, my #gen48 #runwayml film, “4 Minutes to Live” is complete.
I was dumb and spent the first 16 hours just writing and rewriting the script. I poured my heart into the saddest love story, and then spent the following 32 hours creating visuals to match it.
I was dumb and spent the first 16 hours just writing and rewriting the script. I poured my heart into the saddest love story, and then spent the following 32 hours creating visuals to match it.
3
Script:
When I created this story a year ago, I needed an excuse for why character consistency didn't exist.
What if you woke up in another person's body each day?
A year later, my friend (and Emmy Award winning writer) Mike Ryan adapted the script to 9 minutes with me.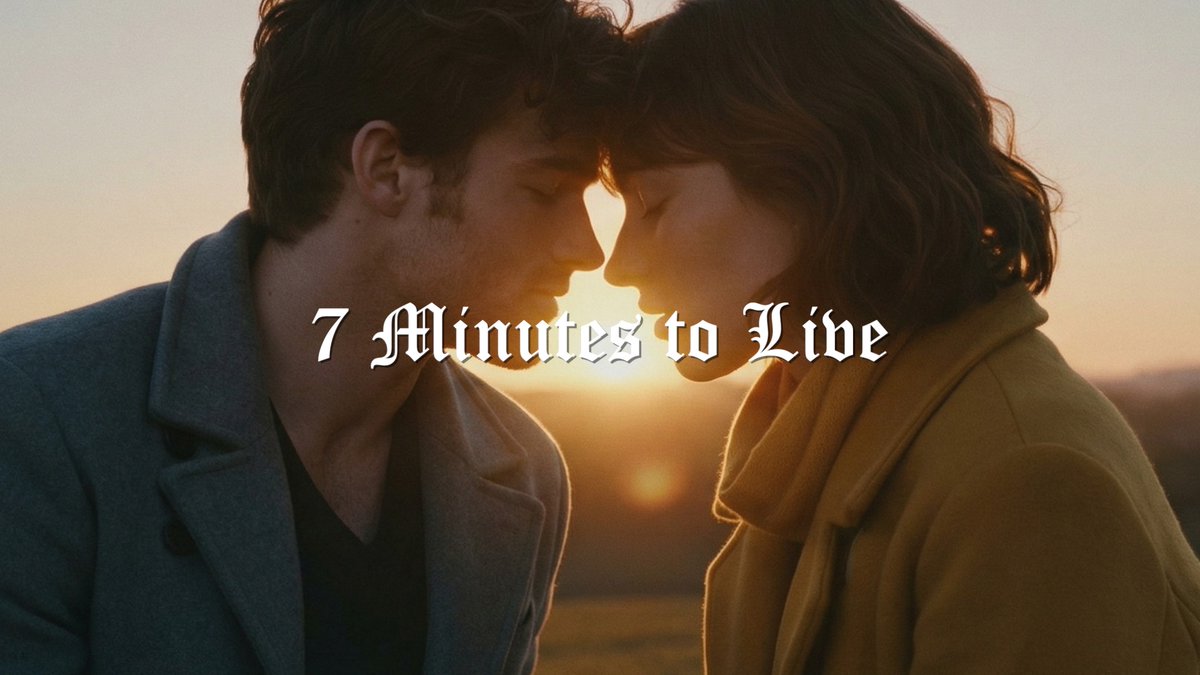
When I created this story a year ago, I needed an excuse for why character consistency didn't exist.
What if you woke up in another person's body each day?
A year later, my friend (and Emmy Award winning writer) Mike Ryan adapted the script to 9 minutes with me.
4
Shotlist:
I asked my friend Dean Israelite (director of the Power Rangers movie) if he would direct this film while I played more of a showrunner and AI orchestrator.
He started the process by creating a shotlist.
Pro tip:
If you're new to shotlisting, upload your script to Gemini and ask it to create a shot list for you as if Gemini were an award-winning director.
Then tweak the shotlist to match your vision but it can do a pretty good first pass at the shots.
I asked my friend Dean Israelite (director of the Power Rangers movie) if he would direct this film while I played more of a showrunner and AI orchestrator.
He started the process by creating a shotlist.
Pro tip:
If you're new to shotlisting, upload your script to Gemini and ask it to create a shot list for you as if Gemini were an award-winning director.
Then tweak the shotlist to match your vision but it can do a pretty good first pass at the shots.
5
Character Creation:
Before generating scenes, generate your main characters for the film.
Prompt them on an off-white background with soft lighting and subtle shadows.
First find a face that you like, then use Nano Banana Pro to generate a wide shot or two of them.
Before generating scenes, generate your main characters for the film.
Prompt them on an off-white background with soft lighting and subtle shadows.
First find a face that you like, then use Nano Banana Pro to generate a wide shot or two of them.
6
Character Sheet:
You don't need to do the 3x3 grid for a character sheet. It actually hurts your consistency because it's too low-resolution.
Just generate two shots, a close-up and a wide, and stitch them together as one image.
This is what you'll use as a char ref later.
You don't need to do the 3x3 grid for a character sheet. It actually hurts your consistency because it's too low-resolution.
Just generate two shots, a close-up and a wide, and stitch them together as one image.
This is what you'll use as a char ref later.
7
Shot Organization:
If you learn nothing else from this thread, this is the most important thing I can teach to you today.
Having a framework like this in Milanote (below), Figma, or Miro can help you divide your film into scenes.
I took each shot on the shotlist for this scene and divided them into rows.
This made it easy for our cinematographers to stay organized and see the shots in the scene in relation to one another.
Take a minute to click on the image below and study the details:
• Character refs
• Location reference
• Shot descriptions
• Shot Numbers
• Options for each image
• Images with colored borders to show "selects"
If you learn nothing else from this thread, this is the most important thing I can teach to you today.
Having a framework like this in Milanote (below), Figma, or Miro can help you divide your film into scenes.
I took each shot on the shotlist for this scene and divided them into rows.
This made it easy for our cinematographers to stay organized and see the shots in the scene in relation to one another.
Take a minute to click on the image below and study the details:
• Character refs
• Location reference
• Shot descriptions
• Shot Numbers
• Options for each image
• Images with colored borders to show "selects"
8
Shot Org 2:
I first generate plate shots of the scene, and then I drop actors into the scene (see images on left side)
I then use those as references for a lot of the shots in the scene for consistency (and place them on the right side next to each shot).
I first generate plate shots of the scene, and then I drop actors into the scene (see images on left side)
I then use those as references for a lot of the shots in the scene for consistency (and place them on the right side next to each shot).
9
Image Generation Overview:
To generate the images, we want to use a platform that supports Nano Banana Pro.
I used @freepik for this.
Notice how i'm easily able to add my character sheet as a reference and also a style reference?
You don't need a fancy prompt.
To generate the images, we want to use a platform that supports Nano Banana Pro.
I used @freepik for this.
Notice how i'm easily able to add my character sheet as a reference and also a style reference?
You don't need a fancy prompt.
10
Style Reference:
I took references from my original film and created a collage image so that it gets a cohesive aesthetic style but also some variation in the lighting and time of day.
Always use a style ref for consistency in a project!
I took references from my original film and created a collage image so that it gets a cohesive aesthetic style but also some variation in the lighting and time of day.
Always use a style ref for consistency in a project!
11
Image Gen:
Initially, we just generated everything a shot at a time.
(attached)
And then Nano Banana Pro came out halfway through and it unlocked a new technique for location consistency.
Check out the image grid in the next post.
Initially, we just generated everything a shot at a time.
(attached)
And then Nano Banana Pro came out halfway through and it unlocked a new technique for location consistency.
Check out the image grid in the next post.
12
Image Gen: 4 Image Stack
This technique is superior to the 3x3 because it retains details in the face and scene.
Generate this in 9:16 and use a prompt like:
Create one image divided into four stacked 16:9 frames, each a closer CU or ECU of the same moment. Hand-held wide shot in a Paris park at early morning, Eiffel Tower in BG. sleeps on a distant bench, then wakes and sits up. Camera rushes toward him hand-held with natural shake and subtle motion blur, then cuts to a top-down overhead shot as he finishes sitting up. Character: late 20s, attractive, tousled hair, sun-kissed skin, expressive eyes, slight stubble. Style: grounded realism, dramatic natural light, rich contrast, deep shadows, soft diffusion, subtle 35mm grain.
The prompt can be much simpler but what you want to do is tell it to get the 4 different shots (or just 4 angles) from your shotlist.
Thanks to @henrydaubrez for being the first to create this technique!
This technique is superior to the 3x3 because it retains details in the face and scene.
Generate this in 9:16 and use a prompt like:
Create one image divided into four stacked 16:9 frames, each a closer CU or ECU of the same moment. Hand-held wide shot in a Paris park at early morning, Eiffel Tower in BG. sleeps on a distant bench, then wakes and sits up. Camera rushes toward him hand-held with natural shake and subtle motion blur, then cuts to a top-down overhead shot as he finishes sitting up. Character: late 20s, attractive, tousled hair, sun-kissed skin, expressive eyes, slight stubble. Style: grounded realism, dramatic natural light, rich contrast, deep shadows, soft diffusion, subtle 35mm grain.
The prompt can be much simpler but what you want to do is tell it to get the 4 different shots (or just 4 angles) from your shotlist.
Thanks to @henrydaubrez for being the first to create this technique!
13
Image Gen: 3x3 Grid
The other popular technique to keep spatial consistency in a scene is this 3x3 technique.
There's also an automated version of this inside @higgsfield_ai that I haven't tried yet, but it seems really turnkey and easy.
Personally, I still prefer the 1x4 or 2x2 four-image collage because it retains details much better and makes upscaling a lot easier.
However, the 3x3 grid still a great technique and you can work with Gemini to split your shotlist for the scene in to 9 different prompts in this one image:
"Cinematic 3x3 photorealistic film still grid. Character (matches reference 100%): Late-20s male prisoner, short hair, stubble, orange jumpsuit, sitting on the edge of a cot in the center of the room. Pose (Identical in all 9 shots): He is hunched over, elbows resting on knees, holding a piece of paper steady with one hand while frantically writing with a pen in the other. Environment: Grimy prison cell. Lighting: Heavy, high-contrast backlighting from a barred window directly behind him, creating a silhouette/rim-light effect; front of character is in shadow.
Shots to include (Camera moves around the static subject):
Wide Master Shot (Profile): Wide angle from the side showing the full profile of the character sitting on the bed writing, the beam of light from the window cutting across the dusty air f/8.0;
Low Angle Frontal: Camera placed low on the floor looking up at his face as he writes, the barred window looming high behind his head like a halo f/4.0;
High Angle / Top-Down: Bird's-eye view looking directly down at the top of his head and the paper, emphasizing his isolation in the center of the room f/5.6;
Medium Shot (Frontal): Direct frontal angle, face partially obscured by shadow, rim light catching the edge of his jaw and the hand moving the pen 50mm;
Over-The-Shoulder (Rear): Shot from behind the character, framing his silhouette against the bright window, looking over his shoulder at the motion of his hand writing f/2.8;
Medium Close-Up (Profile): Tight profile shot focusing on his intense expression as he looks down at the paper, sweat visible on his temple f/1.8;
Dutch Angle / Canted: A slightly tilted medium shot from the front-right, adding tension and unease to the image of him writing f/2.5;
Wide Shot (From Doorway): Shot through the bars of the cell door in the foreground, seeing the character in the distance, still hunched and writing 24mm;
Close-Up (Low Angle): Tight on the face looking down, the reflection of the paper visible in his eyes, background blown out by the window light f/1.4.
Capture: Arri Alexa aesthetic, anamorphic lens flares, heavy backlighting, high contrast, desaturated cool tones with warm window light, cinematic film grain. Mood: Obsessive, isolated, frantic, noir-thriller."
The other popular technique to keep spatial consistency in a scene is this 3x3 technique.
There's also an automated version of this inside @higgsfield_ai that I haven't tried yet, but it seems really turnkey and easy.
Personally, I still prefer the 1x4 or 2x2 four-image collage because it retains details much better and makes upscaling a lot easier.
However, the 3x3 grid still a great technique and you can work with Gemini to split your shotlist for the scene in to 9 different prompts in this one image:
"Cinematic 3x3 photorealistic film still grid. Character (matches reference 100%): Late-20s male prisoner, short hair, stubble, orange jumpsuit, sitting on the edge of a cot in the center of the room. Pose (Identical in all 9 shots): He is hunched over, elbows resting on knees, holding a piece of paper steady with one hand while frantically writing with a pen in the other. Environment: Grimy prison cell. Lighting: Heavy, high-contrast backlighting from a barred window directly behind him, creating a silhouette/rim-light effect; front of character is in shadow.
Shots to include (Camera moves around the static subject):
Wide Master Shot (Profile): Wide angle from the side showing the full profile of the character sitting on the bed writing, the beam of light from the window cutting across the dusty air f/8.0;
Low Angle Frontal: Camera placed low on the floor looking up at his face as he writes, the barred window looming high behind his head like a halo f/4.0;
High Angle / Top-Down: Bird's-eye view looking directly down at the top of his head and the paper, emphasizing his isolation in the center of the room f/5.6;
Medium Shot (Frontal): Direct frontal angle, face partially obscured by shadow, rim light catching the edge of his jaw and the hand moving the pen 50mm;
Over-The-Shoulder (Rear): Shot from behind the character, framing his silhouette against the bright window, looking over his shoulder at the motion of his hand writing f/2.8;
Medium Close-Up (Profile): Tight profile shot focusing on his intense expression as he looks down at the paper, sweat visible on his temple f/1.8;
Dutch Angle / Canted: A slightly tilted medium shot from the front-right, adding tension and unease to the image of him writing f/2.5;
Wide Shot (From Doorway): Shot through the bars of the cell door in the foreground, seeing the character in the distance, still hunched and writing 24mm;
Close-Up (Low Angle): Tight on the face looking down, the reflection of the paper visible in his eyes, background blown out by the window light f/1.4.
Capture: Arri Alexa aesthetic, anamorphic lens flares, heavy backlighting, high contrast, desaturated cool tones with warm window light, cinematic film grain. Mood: Obsessive, isolated, frantic, noir-thriller."
14
Upscaling:
Once you like a frame, zoom in so it takes up your whole screen and then screenshot just that image (or crop it).
Prompt some variation of this:
Upscale this image to 4k, make sure he has photorealistic skin but keep the same lighting and color
If the face drifts too much you can always add a character reference or face swap.
Once you like a frame, zoom in so it takes up your whole screen and then screenshot just that image (or crop it).
Prompt some variation of this:
Upscale this image to 4k, make sure he has photorealistic skin but keep the same lighting and color
If the face drifts too much you can always add a character reference or face swap.
15
Animation:
For animation, I like Google Flow because you get unlimited Veo 3.1 generations.
(Also for the contest, we were limited to just using Google models)
You don't need to overcomplicate animation prompts but if you give Gemini a prompt structure like this and tell it to give you a prompt for each shot on your shotlist, it will help you get more nuanced performances :)
We used Fast mode for most shots, but did switch to Quality mode for speaking shots (expensive but 10% better)
My biggest tip is stay tight with medium shots and closeup shots for talking, it will look wayyyyy better than wide shots of characters talking.
Prompt:
"A clean close-up of Quinn seated in the Paris café, held in soft teal light. Shot on an ARRI Alexa Mini LF with Cooke Panchro /i Classic lenses at T1.8. The camera stays completely still, fixed only on her. No part of the other person is visible at any point.
Her gaze remains exactly where it is in the frame: lifted slightly upward, steady, calm, never shifting. She keeps that gentle upward focus for the entire shot, as if speaking to someone standing just above her eye line — but the camera never reveals them.
She speaks softly, with minimal lip movement, her tone relaxed and subtly amused:
“…that only emperors could wear it?”
There is no dramatic pause — just a natural, tiny breath — and during it, her expression softens. A small, dry, quietly flirtatious smile forms at one corner of her mouth, subtle and private, her eyes warming without ever changing direction.
She continues in that same soft, nearly conversational tone:
“You’re actually the third guy to try that same exact line on me just today.”
Her delivery stays understated — warm, low, almost effortless. Her lips barely move; most of the emotion sits in her eyes. They hold that same upward gaze, but with a clearer spark now: a gentle amusement, a touch of curiosity, the flicker of someone enjoying this moment more than she lets on.
No big reactions.
No eye darts.
No shifting posture.
Just a woman speaking softly, looking slightly up, with a quiet humour and a warm, subtly flirtatious glow in her eyes — all contained, cinematic, and natural.
For animation, I like Google Flow because you get unlimited Veo 3.1 generations.
(Also for the contest, we were limited to just using Google models)
You don't need to overcomplicate animation prompts but if you give Gemini a prompt structure like this and tell it to give you a prompt for each shot on your shotlist, it will help you get more nuanced performances :)
We used Fast mode for most shots, but did switch to Quality mode for speaking shots (expensive but 10% better)
My biggest tip is stay tight with medium shots and closeup shots for talking, it will look wayyyyy better than wide shots of characters talking.
Prompt:
"A clean close-up of Quinn seated in the Paris café, held in soft teal light. Shot on an ARRI Alexa Mini LF with Cooke Panchro /i Classic lenses at T1.8. The camera stays completely still, fixed only on her. No part of the other person is visible at any point.
Her gaze remains exactly where it is in the frame: lifted slightly upward, steady, calm, never shifting. She keeps that gentle upward focus for the entire shot, as if speaking to someone standing just above her eye line — but the camera never reveals them.
She speaks softly, with minimal lip movement, her tone relaxed and subtly amused:
“…that only emperors could wear it?”
There is no dramatic pause — just a natural, tiny breath — and during it, her expression softens. A small, dry, quietly flirtatious smile forms at one corner of her mouth, subtle and private, her eyes warming without ever changing direction.
She continues in that same soft, nearly conversational tone:
“You’re actually the third guy to try that same exact line on me just today.”
Her delivery stays understated — warm, low, almost effortless. Her lips barely move; most of the emotion sits in her eyes. They hold that same upward gaze, but with a clearer spark now: a gentle amusement, a touch of curiosity, the flicker of someone enjoying this moment more than she lets on.
No big reactions.
No eye darts.
No shifting posture.
Just a woman speaking softly, looking slightly up, with a quiet humour and a warm, subtly flirtatious glow in her eyes — all contained, cinematic, and natural.
16
Editing:
Pro tip: Name all your file names in your shots/animations based on your scenes so your file organization stays consistent.
E.g. - 14 - C - Quinn saying Hello
Our editor, Martin Bernfeld did a fantastic job with the pacing and flow over the 9 minute film (not easy).
Pro tip: Name all your file names in your shots/animations based on your scenes so your file organization stays consistent.
E.g. - 14 - C - Quinn saying Hello
Our editor, Martin Bernfeld did a fantastic job with the pacing and flow over the 9 minute film (not easy).
17
If you want to make AI films like this, I'd HIGHLY recommend you join Rourke's community, GenHQ.
I don't make courses, but his are the best in the world and expand on what I've showcased above.
His community is awesome and he updates vids each week:
skool.com/genhq/about?re…
I don't make courses, but his are the best in the world and expand on what I've showcased above.
His community is awesome and he updates vids each week:
skool.com/genhq/about?re…
18
Massive thanks to all our cinematographers and crew
CINEMATOGRAPHY / ANIMATION
@Gabriel_Olson
@lukehpalmer
@olgabrnv
@nickmaharfilms
Matthew Warter
Evan Zissimopulos
Sina Dolati
Andres Aquino
Alex Duloz
@BLVCKLIGHTai
DIRECTED BY
Dean Israelite
STORY BY
PJ Ace
WRITTEN BY
Michael Ryan
ADDITIONAL WRITING
Nate Dern
EDITOR
Martin Bernfeld
EPs
Dean / PJ
Created by:
PJ Ace
CINEMATOGRAPHY / ANIMATION
@Gabriel_Olson
@lukehpalmer
@olgabrnv
@nickmaharfilms
Matthew Warter
Evan Zissimopulos
Sina Dolati
Andres Aquino
Alex Duloz
@BLVCKLIGHTai
DIRECTED BY
Dean Israelite
STORY BY
PJ Ace
WRITTEN BY
Michael Ryan
ADDITIONAL WRITING
Nate Dern
EDITOR
Martin Bernfeld
EPs
Dean / PJ
Created by:
PJ Ace
19
If you're a brand and you want to work with my company, Genre.ai, check out our website.
Reach out to us, we'd love to see what kind of AI film we can make for you!
Reach out to us, we'd love to see what kind of AI film we can make for you!
20
And if you want to see more breakdowns like this, make sure you're following me and check out my free newsletter.
Each month, I break down all the latest techniques and share them with 17,000 people like yourself!
pjace.beehiiv.com
Each month, I break down all the latest techniques and share them with 17,000 people like yourself!
pjace.beehiiv.com
