Canvas & Ratio
Choose your destination platform format
Layout Template
Choose a content structure for your slides
Preset Themes
Typography & Sizing
Brand Kit Customization
AGENCYConfigure brand assets for headers & footers
Outro Slide CTA
Customize your closing call-to-action slide
Background Pattern
Build Your Carousel
Drag and drop any post card below onto a slide, or use the quick buttons to insert content/images instantly!

I shared how skin retouching can IMPROVE YOUR DESIGNS, and some of you asked how I did it, so here it is!

Our Subject here has pretty severe acne so getting the details right is crucial, This technique is called Frequency Separation, essentially separating texture, colour and surface, stay with me...
Make three copies of your subject, turn off visibility for two, On the last layer, what we are trying to achieve is to even out the spots, scars and blemishes, using the clone stamp tool or healing brush to conceal spots and blemishes. here's a before/ after


On the second layer, we are trying to smoothen everything and you do this using 'surface blur', you don’t want to go overboard but feel free to introduce as much blur as you need and you should have something looks like this,
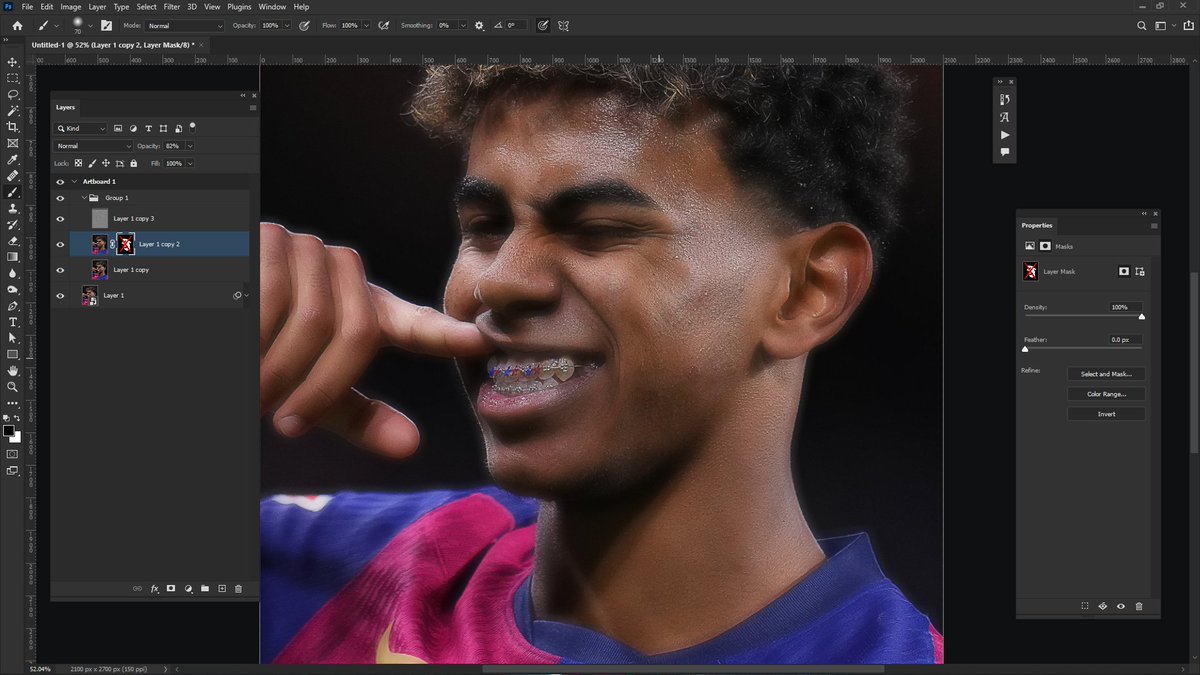
Now that you have that, we need to re-introduce texture and sharpness, we do this in two ways, 1. By masking out the blurred layers on points that accentuate sharpness, places like edges, skin folds and smile lines,


however, it’s still not realistic, 2. We need to bring back the original skin texture, do that with the third layer, here’s how, apply a high pass filter(Go to Filter>Other>high pass) -
-and set it just enough that you can still see skin texture and edges while keeping the whole layer grey-ish. After that, you go in and set the blend mode of the third and upmost layer to 'overlay' (Remember to keep this layer on top)...

That's it!, you can then improve on it by shifting skin tones and boosting highlights depending on the look you’re going for, Hope I've been able to help, Leave a like, RT and share to someone that might need it, Thank you!