This AI Motion Brush tool is insane!
It lets you control the movement and actions of 5 different objects simultaneously. It's the only AI tool can do blocking for AI filmmaking so far.
You have free credits to try on Kling AI, link in comments!
Here’s how to get started:


VIDEO
Step 1:
Set up your scene 🎬
I used @freepik’s Retouch tool to add elements to setup, just make sure all your elements are movable for seamless control!
This step is key to creating dynamic and flexible scenes.
Set up your scene 🎬
I used @freepik’s Retouch tool to add elements to setup, just make sure all your elements are movable for seamless control!
This step is key to creating dynamic and flexible scenes.

VIDEO
Step 2:
- Open the Kling AI website: klingai.com
- Navigate to the “Image to Video” section.
- Upload the image you prepared in Step 1.
- Open the Kling AI website: klingai.com
- Navigate to the “Image to Video” section.
- Upload the image you prepared in Step 1.
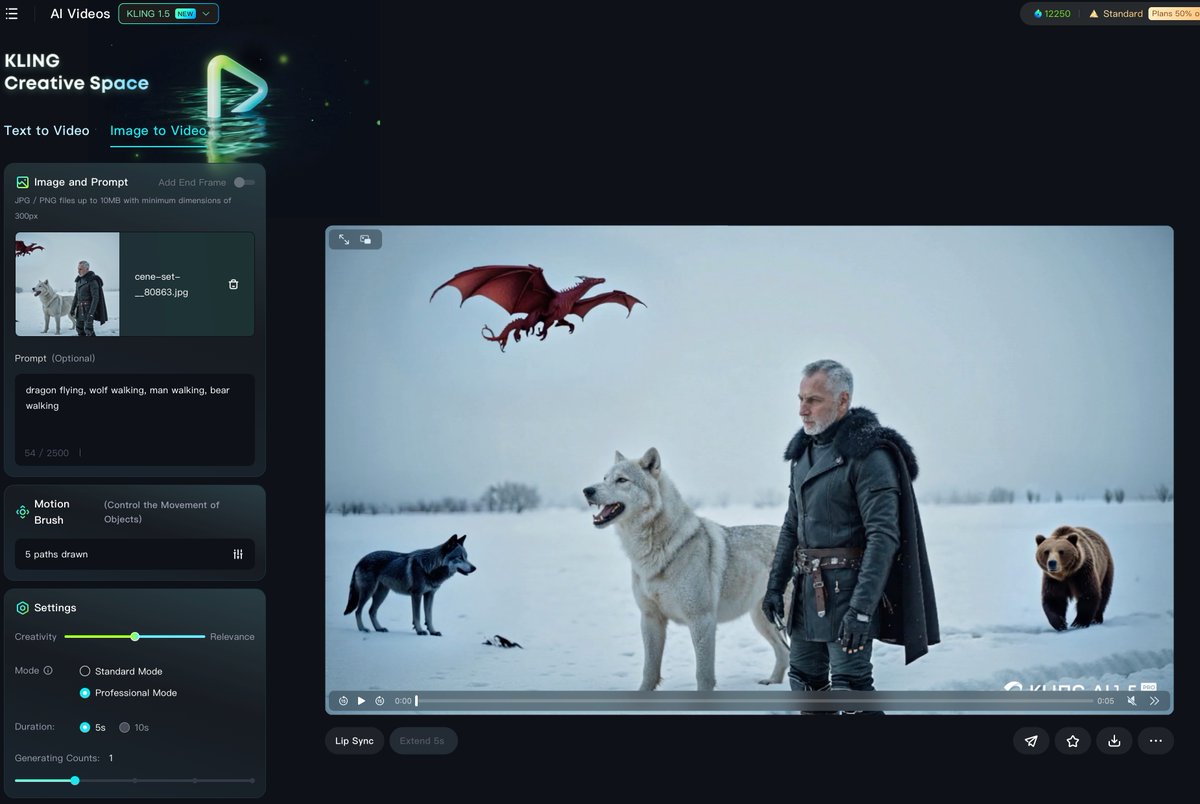
Step 3:
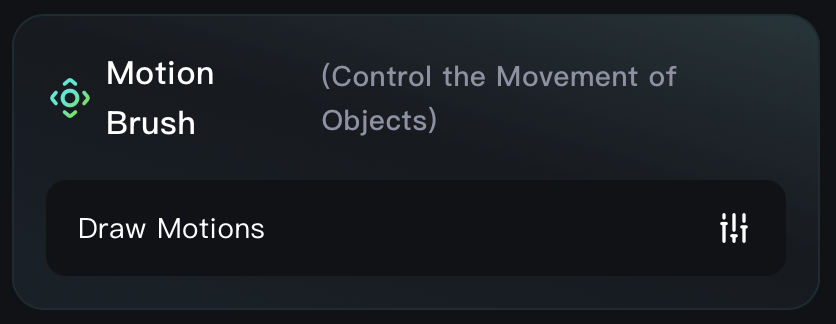
Use the Motion Brush tool and click on “Draw Motions” to begin animating your elements.
Use the Motion Brush tool and click on “Draw Motions” to begin animating your elements.
Step 4:
Most Important Step!
- Turn on Auto-Segmentation, then click on Area 1 to select your first object.
- Draw a line indicating where you want the object to move.
- Repeat this process for the remaining objects
Most Important Step!
- Turn on Auto-Segmentation, then click on Area 1 to select your first object.
- Draw a line indicating where you want the object to move.
- Repeat this process for the remaining objects

Step 5:
Write Your Prompt
Your prompt can be super simple! For example, describe the actions you want for each object. You can assign different movements or behaviors to each one here.
Once your prompt is ready, hit Generate to bring your scene to life!
Write Your Prompt
Your prompt can be super simple! For example, describe the actions you want for each object. You can assign different movements or behaviors to each one here.
Once your prompt is ready, hit Generate to bring your scene to life!

Here are a few examples I created using the previous version of the tool. They showcase how flexible and creative you can get with the Motion Brush!
View Tweet
If you find this useful, follow me @EHuanglu
I’ll keep testing out the latest AI tools and sharing everything I discover.
I’ll keep testing out the latest AI tools and sharing everything I discover.

Generated by Thread Navigator
Press ⌘ + S to quick-export